
On Lacing Your Shoes
Sometimes, it's the little things that help to create success. Champion UCLA basketball coach John Wooden famously spent the first basketball practice each year teaching players to put on their socks properly. After all, it only takes one wrinkle in your sock to cause a blister and distract a player from making the game-winning shot. It's like the famous "For want of a nail...the kingdom was lost" proverb: little things can make a huge difference.

I'm going to assume, if you're a trailrunner, that you already know how to put on your socks. But here's a question: do you know how to lace up your shoes?
I've been tinkering for years with different lacing patterns, trying to achieve the very best fit possible. I like a lot of room in the toebox (so my toes won't go numb) coupled with some kind of anchoring mechanism to keep my foot from sliding forward on those steep downhills (I've lost plenty of toenails, but each time it happens, it still hurts!)
Finally, I think my years of tinkering and observation have resulted in a truly excellent lacing regimen -- one that allows for a roomy toebox but keeps the foot from sliding forward. On the off chance that it helps you, too, here goes...
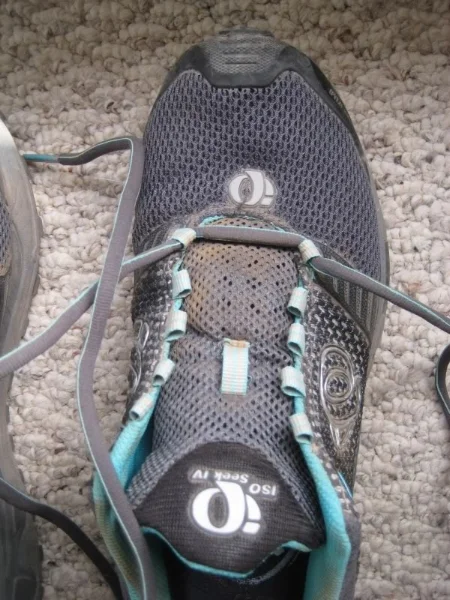
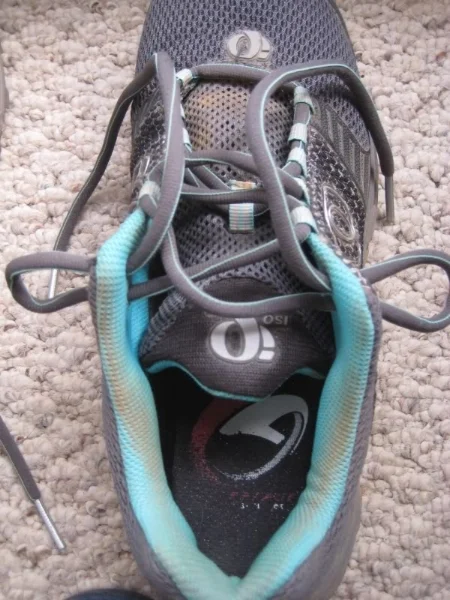
Start the usual way, with the laces strung through the first set of holes or loops.
Then, string the laces straight up the sides of the shoe, without crossing them. Depending on your shoe, this means not crossing the laces for 2 or 3 holes/loops.
At a spot approximately over your arch, cross the laces and thread them into the opposite holes or loops (this may also be the point at which you guide the laces through the loop that holds the tongue of the shoe in place).
Then, cross the laces again until you've used up all but the top two holes or loops.

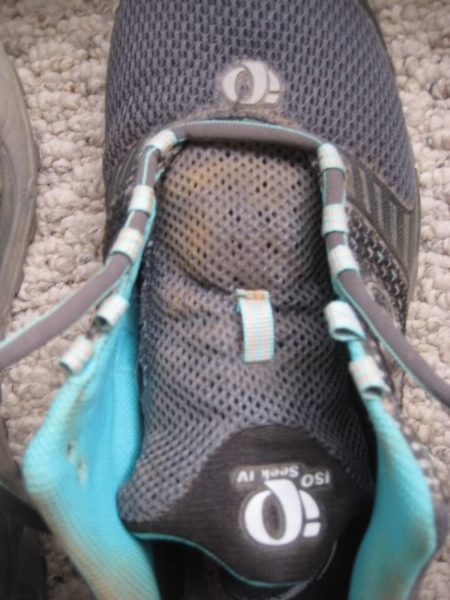
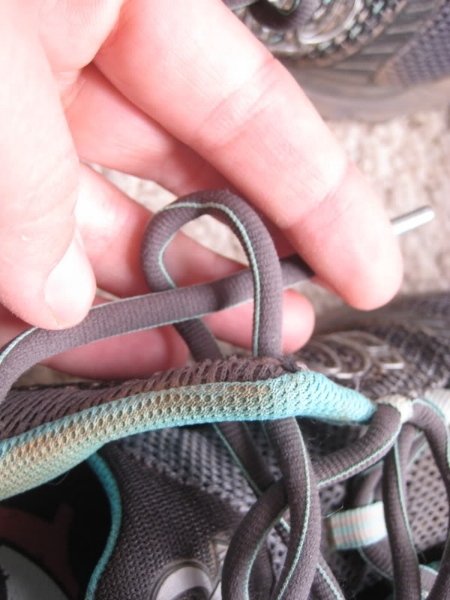
This is where it gets a little bit harder to describe. First, cross the laces over each other and thread the laces on each side up from underneath the very top hole.

Then, push the lace down from above, into the next-to-top hole, creating a loop.
You'll end up with an image something like this, with two loops sticking out each side of the top of the shoe.
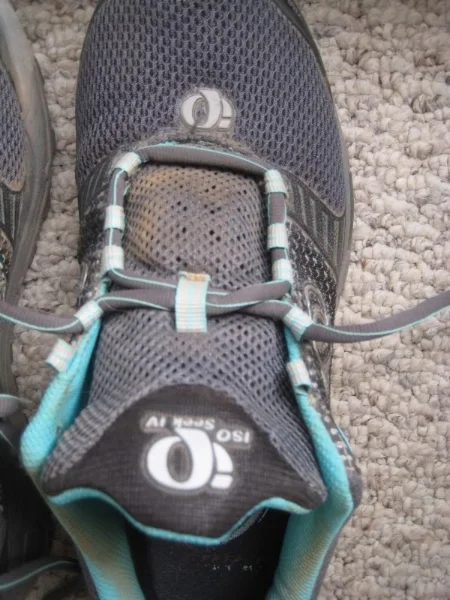
Finally, take the lace ends, and thread them into the loops you've just created.
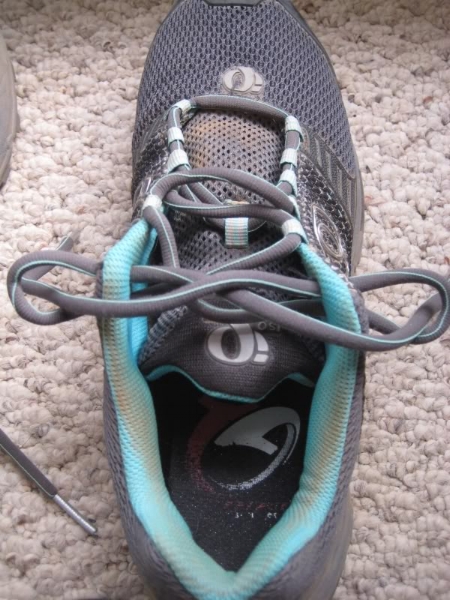
...so in the end, your shoes look like this.
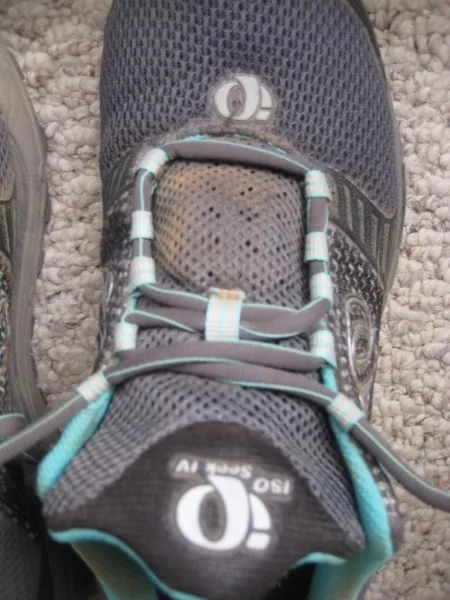
Once you put your foot in and tighten everything up, the fact that you threaded the top laces through those loops is what helps everything stay locked nicely into place, without loosening up as you run downhill.
Everyone's feet are different, so I can't guarantee that this method will work for you. Over the past several months, though, I've been very happy with it.
Happy running, and see you on the trail!